Policy Profile
Policy profiles are crucial in implementing device settings based on specific criteria. These profiles serve as collections of policies that govern the behavior and protection of endpoints. Administrators can ensure consistent endpoint protection throughout the organization by assigning policies to profiles.
The Policy Profile page allows users to create multiple policy profiles and associate devices with them based on various attributes such as device location, operating system, asset status, compliance, department, and more. This enables the enforcement of specific policies tailored to different groups of devices. For example, policies related to SGT (Security Group Tag), VLAN, TrustSec, and policy enforcement can be applied to Network Access Control (NAC) and Firewall appliances responsible for safeguarding the endpoints.
To access the Policy Profile List page, users can navigate to the "Profiles" menu and select the "Policy Profile" option. This page serves as a centralized hub for managing and configuring policy profiles within the system. From here, administrators can create, modify, and delete policy profiles and associate devices with the appropriate profiles.
The creation of policy profiles allows for granular control over the security and management of devices. By mapping devices to specific profiles, administrators can ensure that the appropriate policies are applied based on the unique characteristics of each device. This approach enhances the organization's overall security posture by enforcing tailored policies that align with the specific needs and requirements of different device categories.
Moreover, the Policy Profile List page provides a comprehensive overview of the existing policy profiles. Administrators can view and manage the profiles, including their associated policies and the devices linked to each profile. This centralized view facilitates streamlined policy management and simplifies the enforcement of consistent security measures across the device ecosystem.
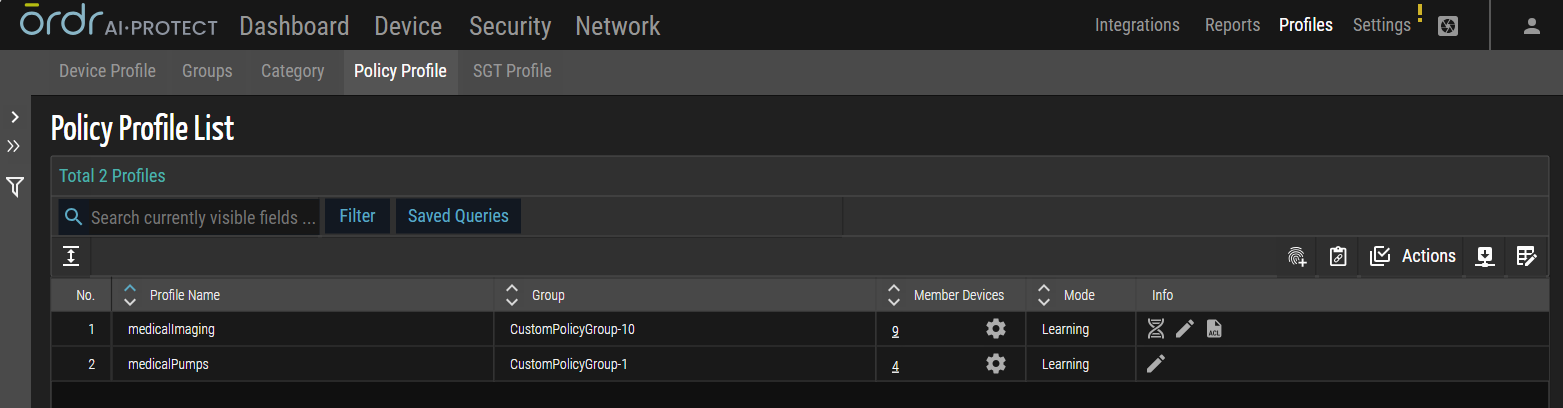
The following table describes the column names on the Policy Profile List page.
| Column Name | Description |
| Profile Name | The name assigned to the policy profile. |
| Group | The name of the group to which the policy group belongs. |
| Member Devices |
The number of devices associated with the policy group. The
|
| Mode |
Indicates the status of the policy profile.
|
| Info |
Includes icons that may be used for additional displays and functions.
|
Create Policy Profile
The Create Policy Profile function in ORDR AI Protect enables administrators to define and manage policy attributes for groups of devices. A policy profile acts as a logical container that associates devices with access control parameters, security tags, and enforcement rules. By creating a profile, administrators establish a structured framework to apply policies consistently across different device groups
- On the Policy Profile List page, click
 .
.
The system opens the New Policy Profile panel for configuration.
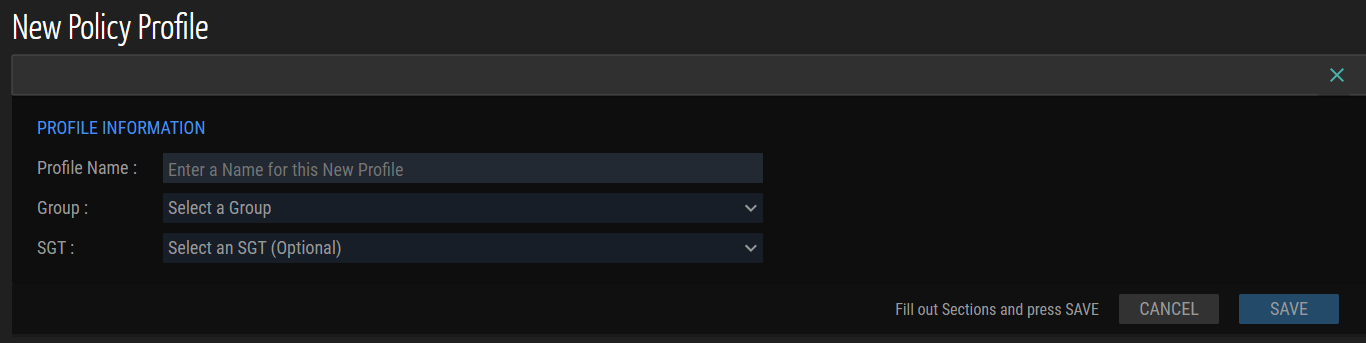
- In the Profile Name field, enter a unique identifier for the policy profile. This identifier is used when referencing the profile during enforcement or integration workflows.
- From the Group drop-down list, assign the profile to the appropriate device group. Groups determine the logical set of endpoints where the policy applies.
- From the Security Group Tag (SGT) drop-down list, select the required tag to define trust boundaries and enforce role-based access control.
- Select Save. The system creates the policy profile within the Policy Profile List for further management.
Modify Policy Profile
In ORDR AI Protect, removing policies enables administrators to revoke previously enforced rules from NAC devices, switches, and firewalls. This operation is required when policies are outdated, replaced, or no longer relevant to the current security framework.
- From the Policy Profile List page, select the record to modify. The system opens the Policy Profile panel in edit mode.
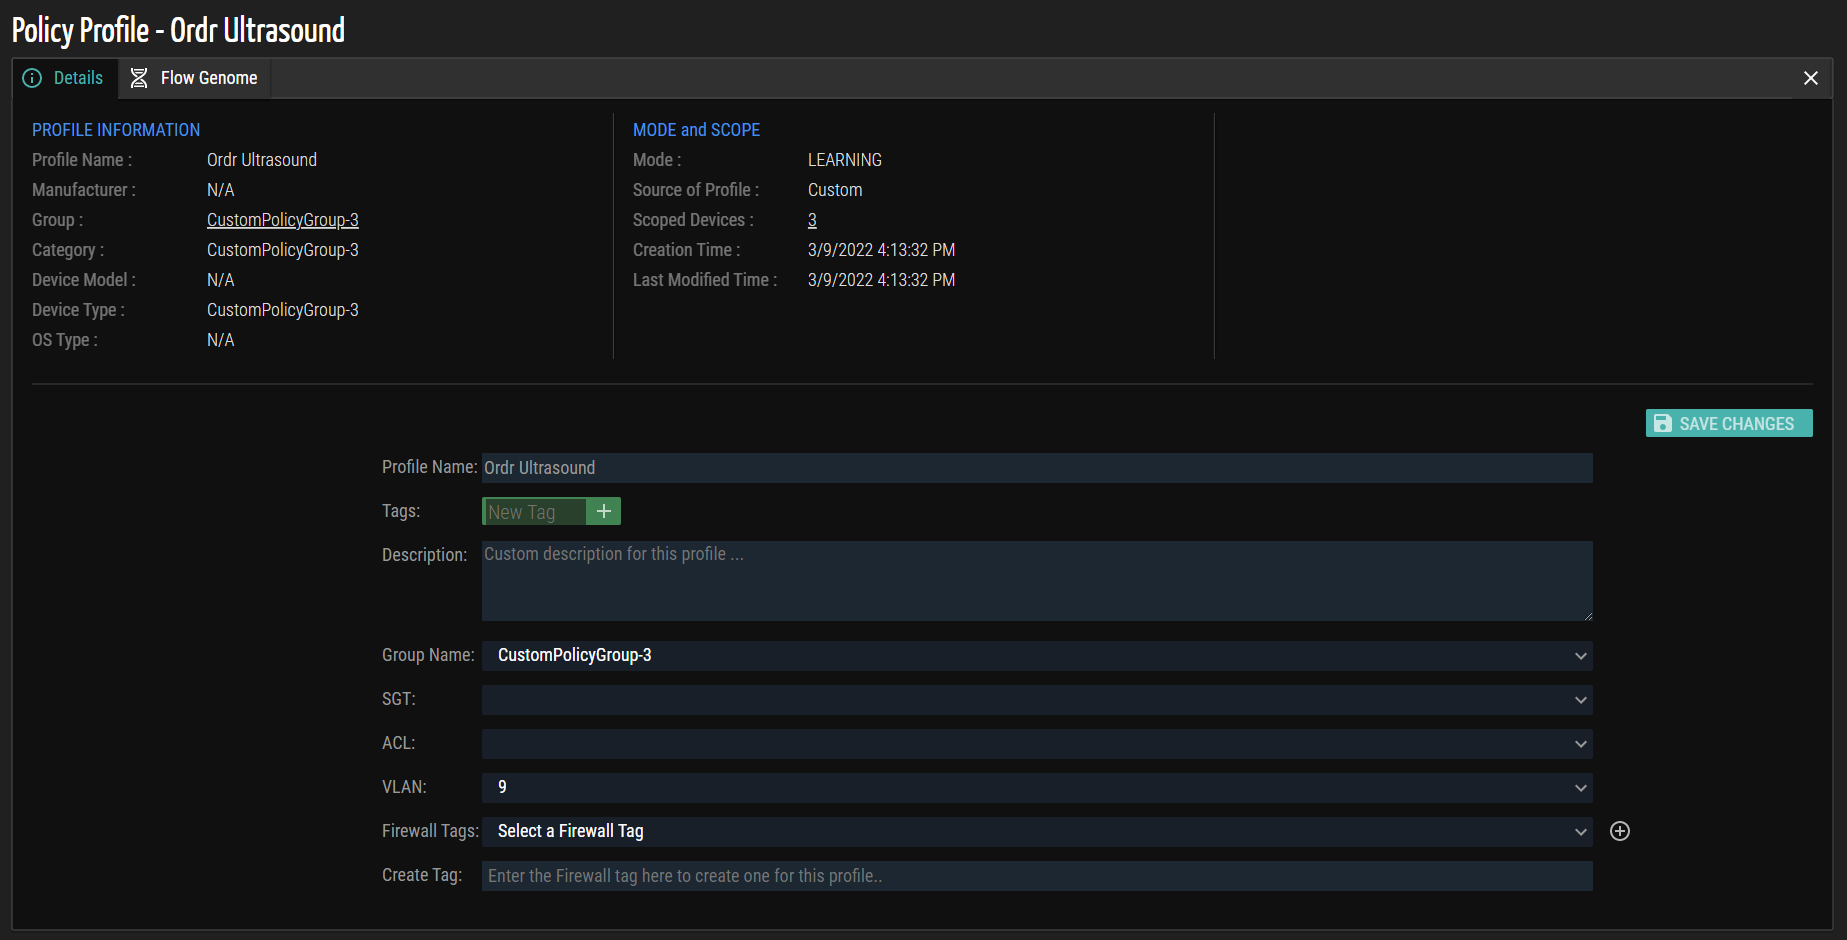
- Update the required fields in the Details tab:
- Profile Name - The name of the Policy Profile.
- Description - The description for the policy profile.
- Group Name - The Group Name associated with the profile. The drop-down list displays a list of current Group names.
- SGT - When integrated with Cisco ISE, the drop-down list displays the current SGTs present in Cisco ISE that can be mapped to all devices in the profile group.
- ACL - When Pre-stage ACLs are enabled, the drop-down list displays all pre-stage access control lists generated in ORDR. Pre-staged ACLs can be mapped to member devices in NAC solutions to assign ACLs to network devices that do not support Downloadable ACLs (dACLs).
- VLAN - The VLAN to assign to all member devices using NAC.
- Firewall Group - When integrated with supported firewall systems, the drop-down list displays available firewall device groups in the target system. The setting allows dynamic grouping/tagging and policy enforcement to apply to all firewalls or only select firewalls in the target solution.
NOTE: The Firewall Group field refers to a group of firewalls, not a group of end hosts. Firewall Groups allow multiple firewalls to be managed as a group and assigned unique policies, for example, a “data center firewall group” or “Internet Edge firewall group”. The Firewall Tag field refers to end devices that are grouped for use in firewall policy rules.
-
Firewall Tags - When integrated with supported firewall systems, the drop-down list displays available firewall address groups or tags predefined in the target system. When Firewall Group is configured, the list of reflective address groups or tags is available in the selected firewall device group. Click the icon to map additional address groups or tags to member devices.
-
Create Tag - This field allows the creation of a custom firewall address group or tag in the target firewall system.
NOTE: The Create Tag field is mutually exclusive from the Firewall Tags field. This field is not visible once devices are mapped to an existing firewall group or tag. When no Firewall Tag is configured, this field is visible and allows an ORDR administrator to define a new firewall address group or tag in the target firewall system. It is strongly recommended that device membership in the custom group/tag only be allowed from ORDR. This ensures that any firewall policy rules published by ORDR directly reflect the membership managed in the ORDR platform.
-
Select Save Changes. The system validates the modifications, stores the updated configuration, and prepares the revised attributes for enforcement.
Flow Genome
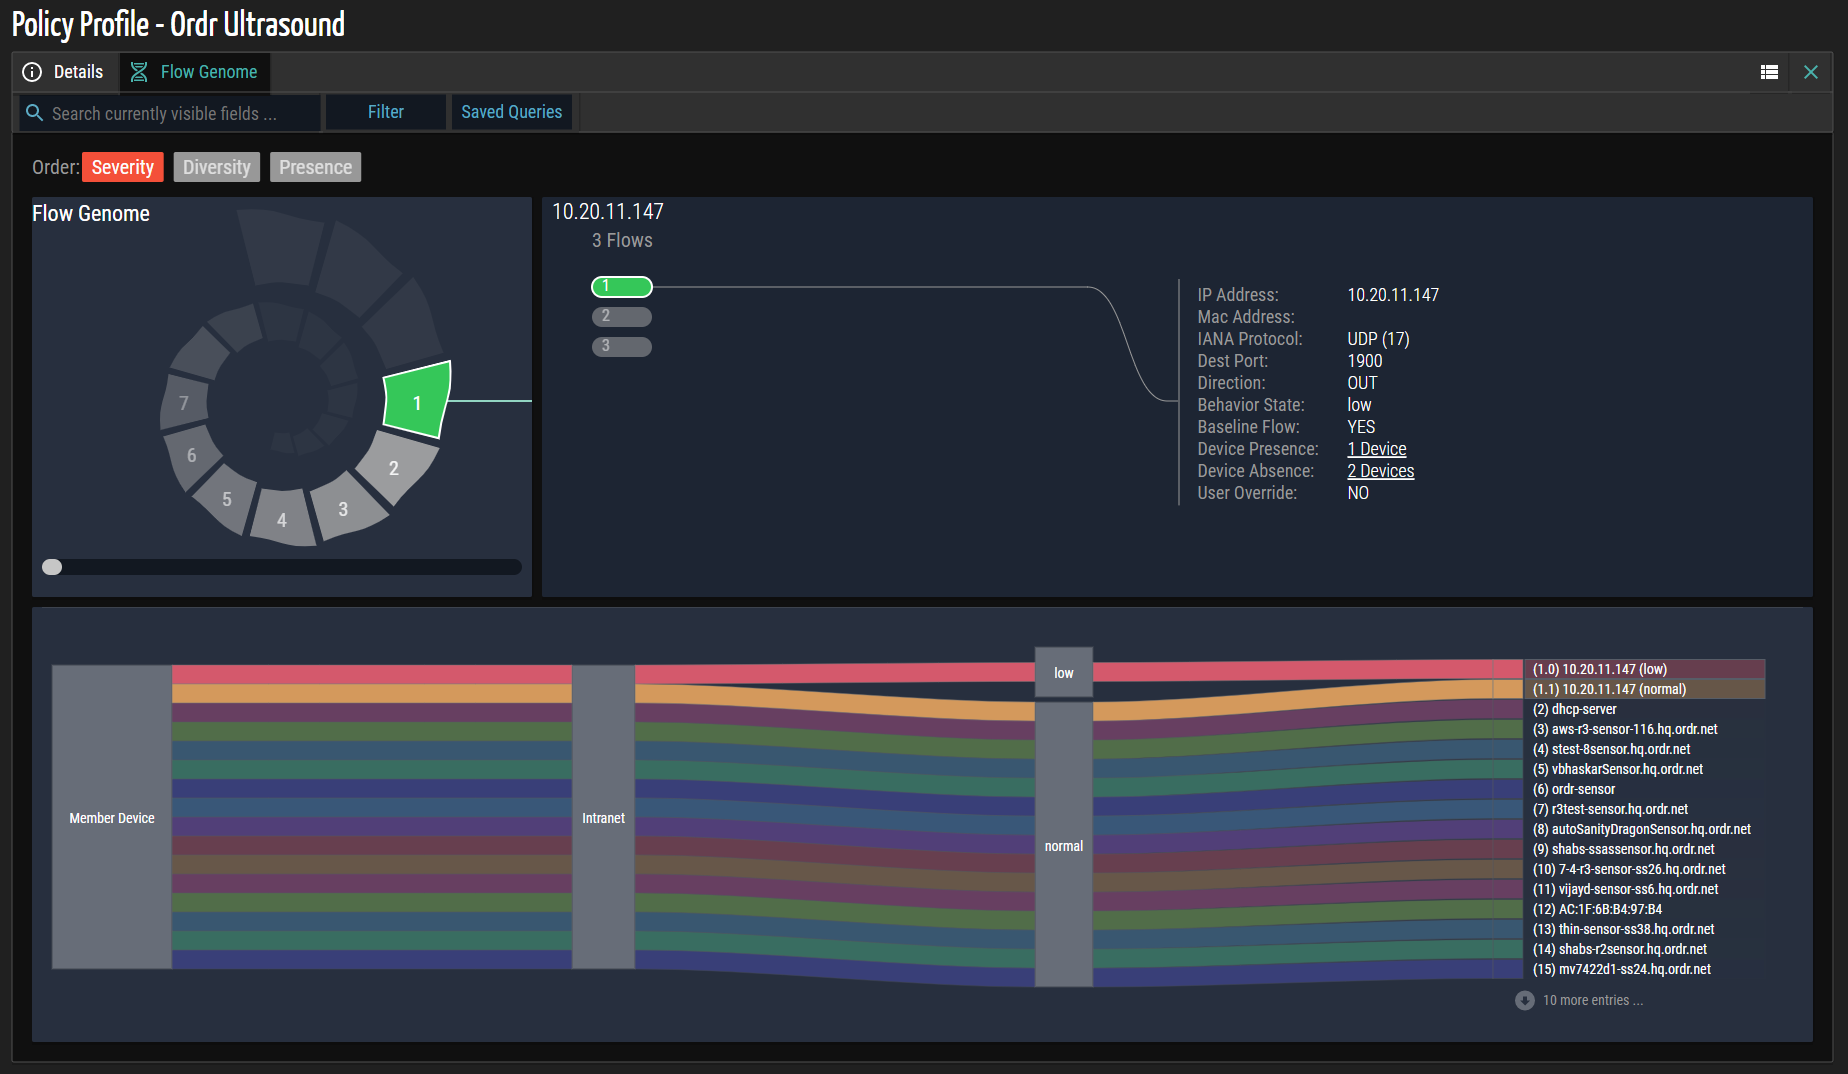
The Policy Profile feature allows users to monitor and analyze network traffic associated with devices within a specific profile group. By recording and analyzing traffic data, valuable insights can be gained to enhance network security and performance.
The Flow Genome icon becomes available upon recording traffic data for devices within a profile group. Users can access this icon by clicking the ![]() icon in the table's Info column. This action triggers the display of the Flow Genome tab, associated with the specific Policy Profile, at the top of the screen.
icon in the table's Info column. This action triggers the display of the Flow Genome tab, associated with the specific Policy Profile, at the top of the screen.
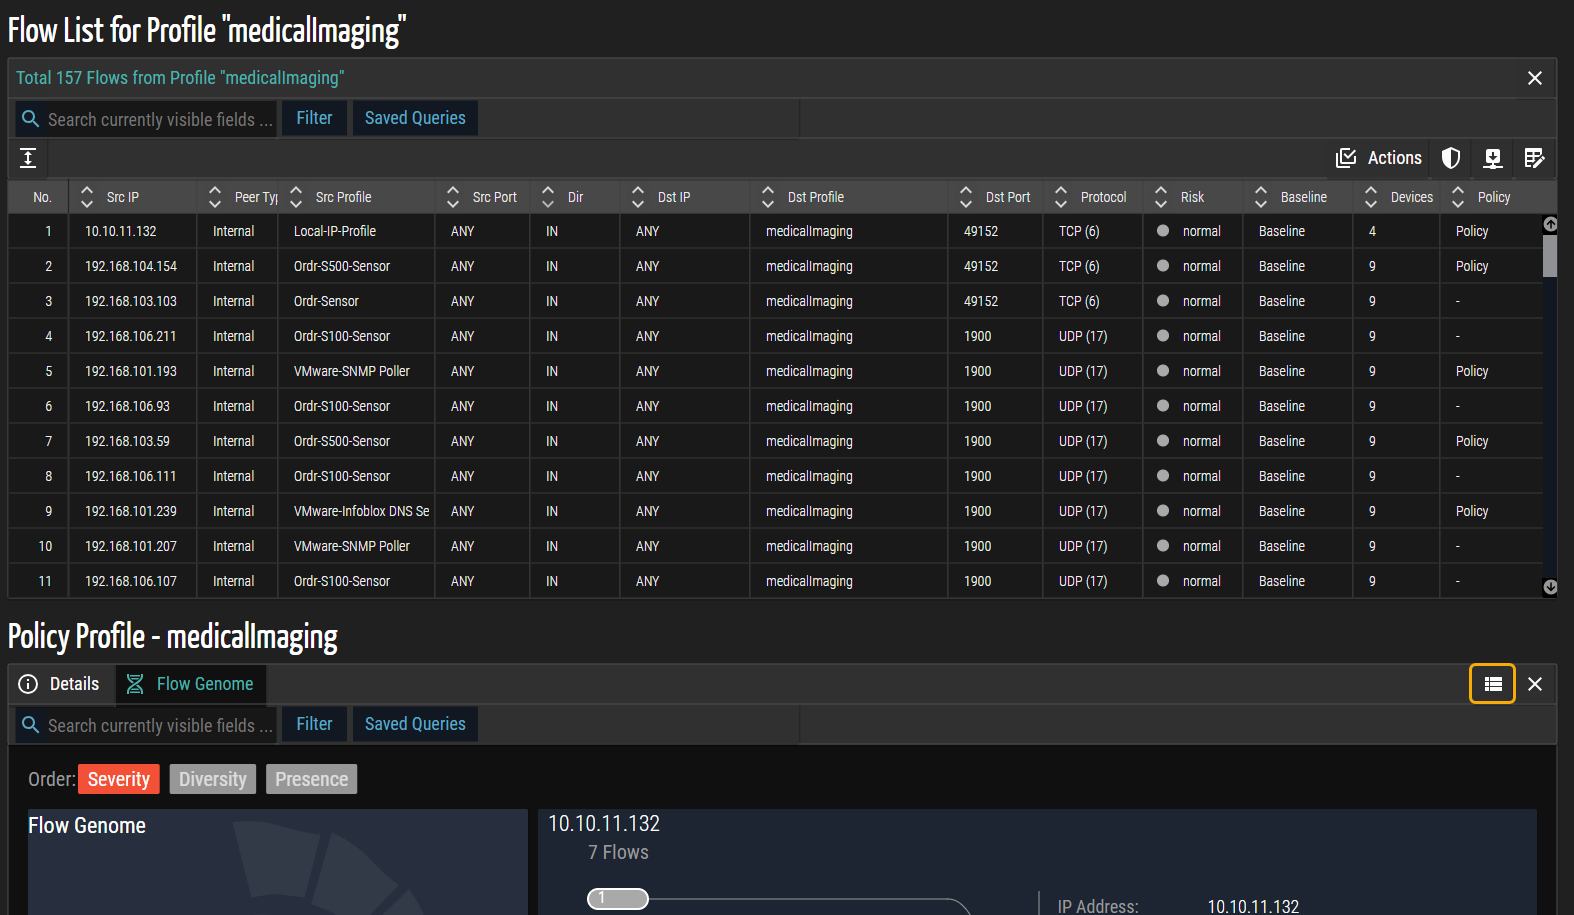
The Flow Genome tab offers a comprehensive overview of the network traffic patterns and behavior within the selected Policy Profile. It provides detailed information and analytics related to the data flow to and from the devices within the profile group. This analysis can help identify anomalies, detect potential security threats, and optimize network performance. To illustrate, an example screenshot showcasing the Flow Genome tab is presented below. This screenshot highlights the visual representation of traffic data, allowing users to understand the network behavior and make informed decisions based on the insights provided.
By leveraging the Policy Profile feature and accessing the Flow Genome tab, users can gain valuable insights into the network traffic patterns and behaviors specific to the devices within a profile group. This empowers administrators and network professionals to proactively monitor, analyze, and optimize network performance while identifying and addressing potential security threats. For additional details, see Flow Genome.
Enforcing Policies from Flow Genome
In ORDR AI Protect, enforcing policies allows administrators to apply selected security controls to NAC devices, switches, and firewalls. Policies are created from identified flows in the Flow Genome and associated with specific device groups. Administrators can review and validate these flows, assign them to policies, and enforce them across the designated network infrastructure. This process ensures that security rules are consistently applied, unauthorized access is restricted, and traffic behavior aligns with organizational requirements.
- Click the
 (View Flow List Panel) icon in the upper right corner of the Flow Genome panel to display the Flow List associated with this profile. The list below represents all inbound and outbound communication to peers, protocols, and ports from or to this profile's selected group of devices.
- Click
 Actions and then select Add Flows to Policy.

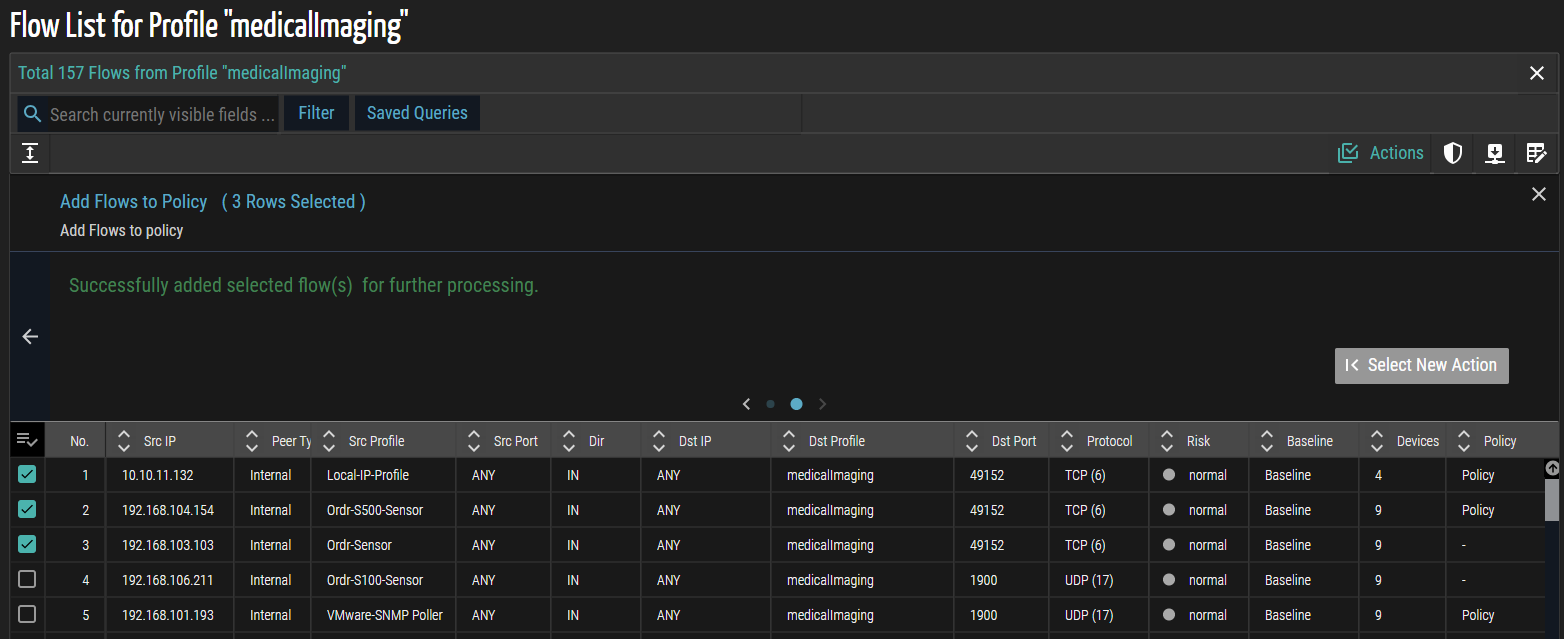
- In the list that appears, review the available flows and select the required ones by checking the corresponding checkboxes to include them in the policy.
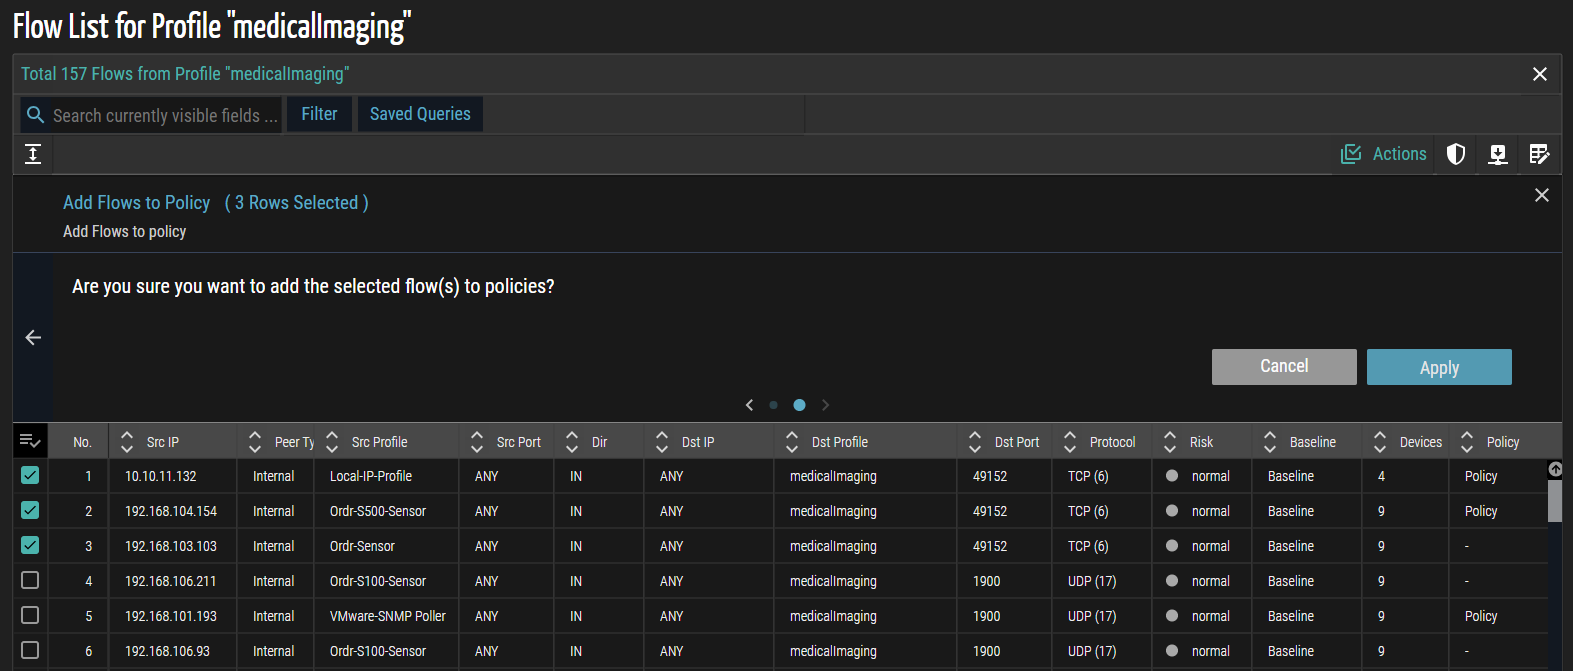
- Click Apply. A confirmation message appears, indicating that the selected flows have been successfully added for further processing.
- Click the
 (View Policy List Panel) icon to display all policies currently associated with the profile. This panel provides an overview of existing policy assignments and their scope, enabling verification and planning for enforcement.
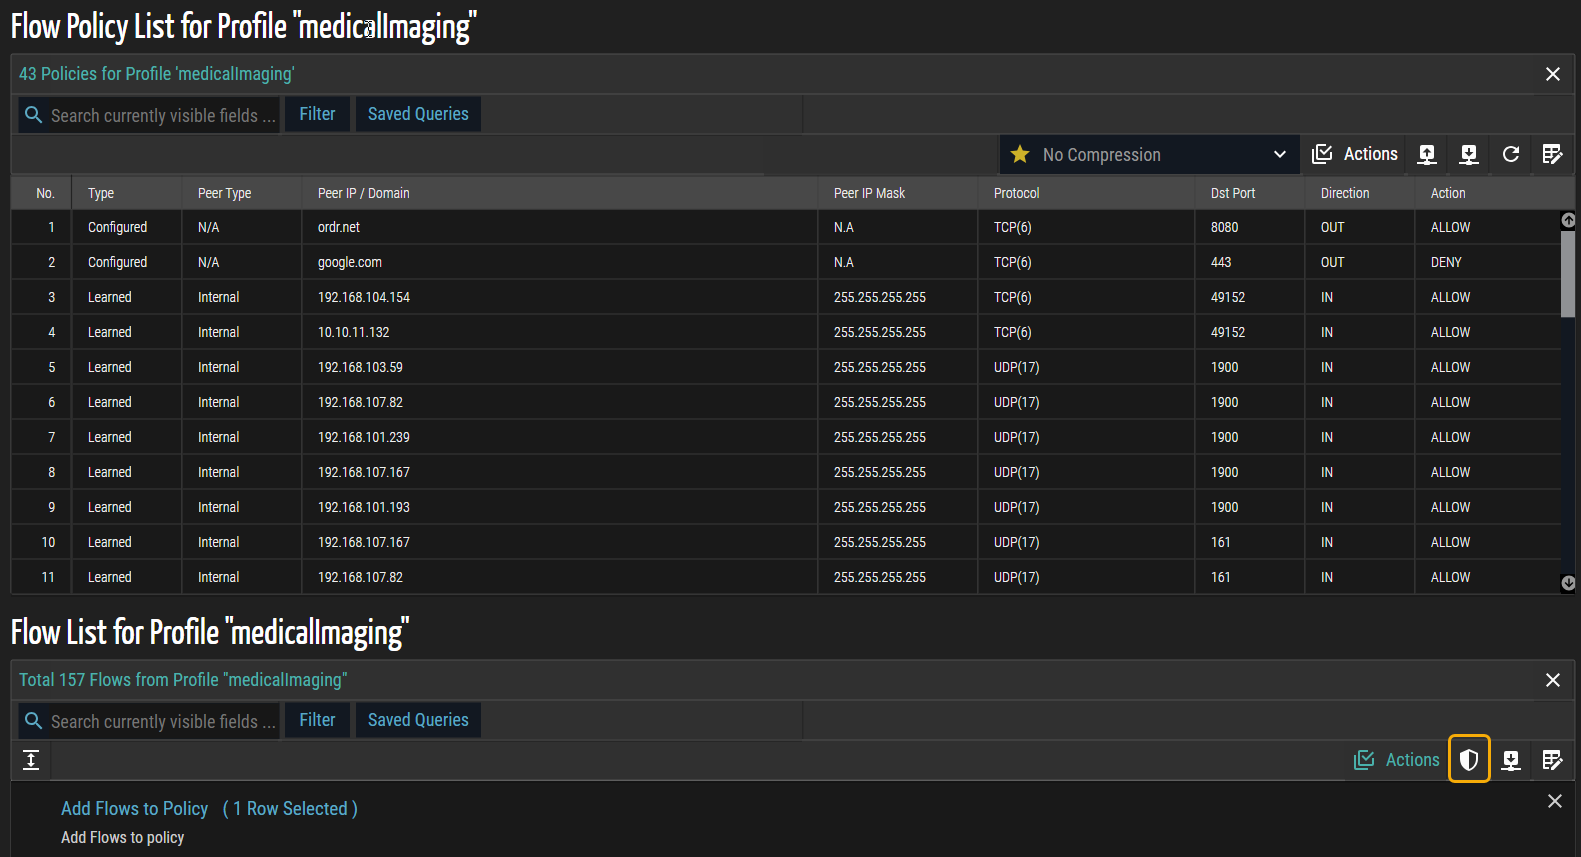
- Click Actions in the Flow Policy List panel to reveal operations applicable to the policies, such as enforcing them on NAC devices, switches, and firewalls.
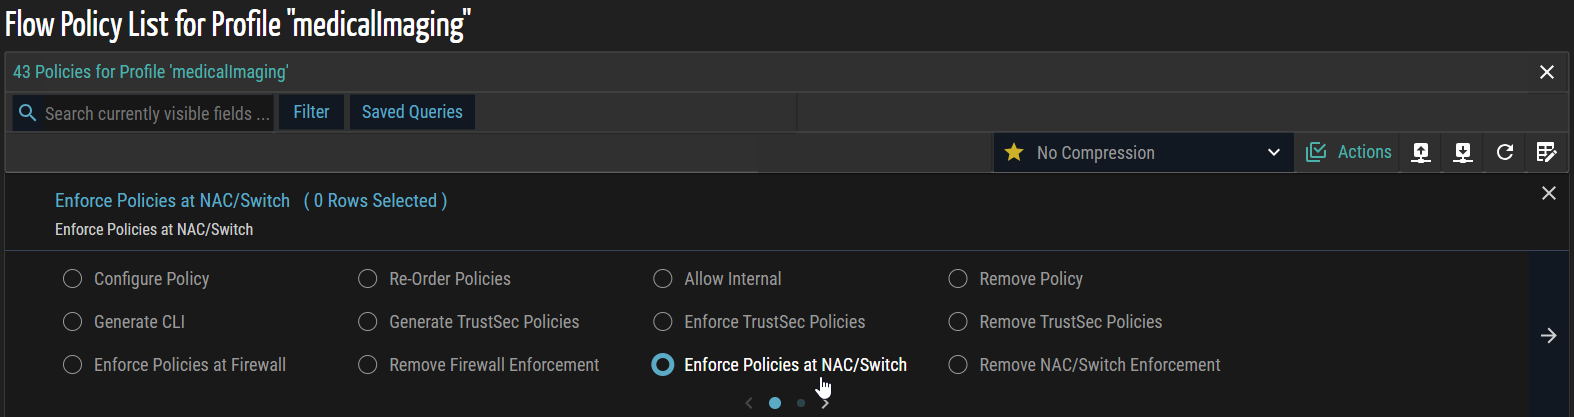
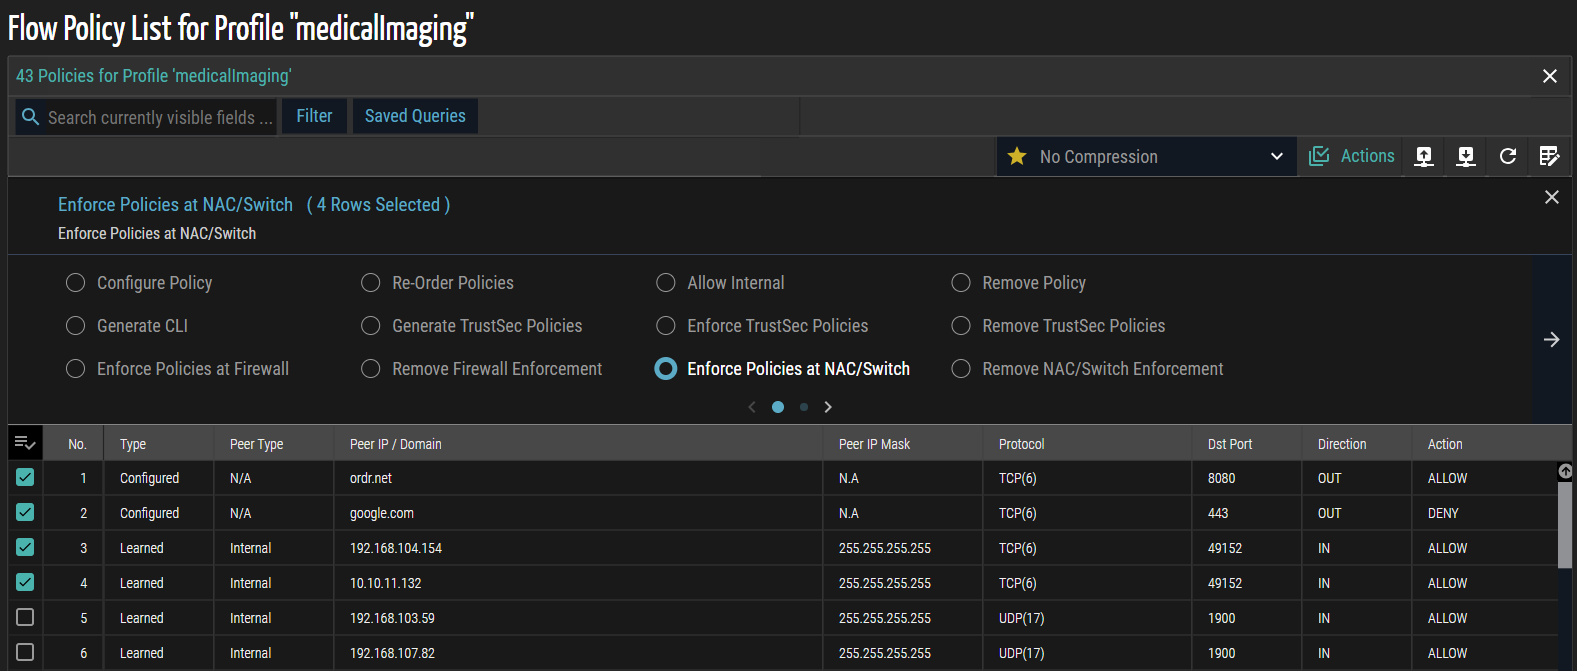
- Select Enforce Policies at NAC/Switch and check the boxes for the specific records you want to enforce. This step pushes the selected policies to the designated network devices, ensuring compliance with security and access rules.
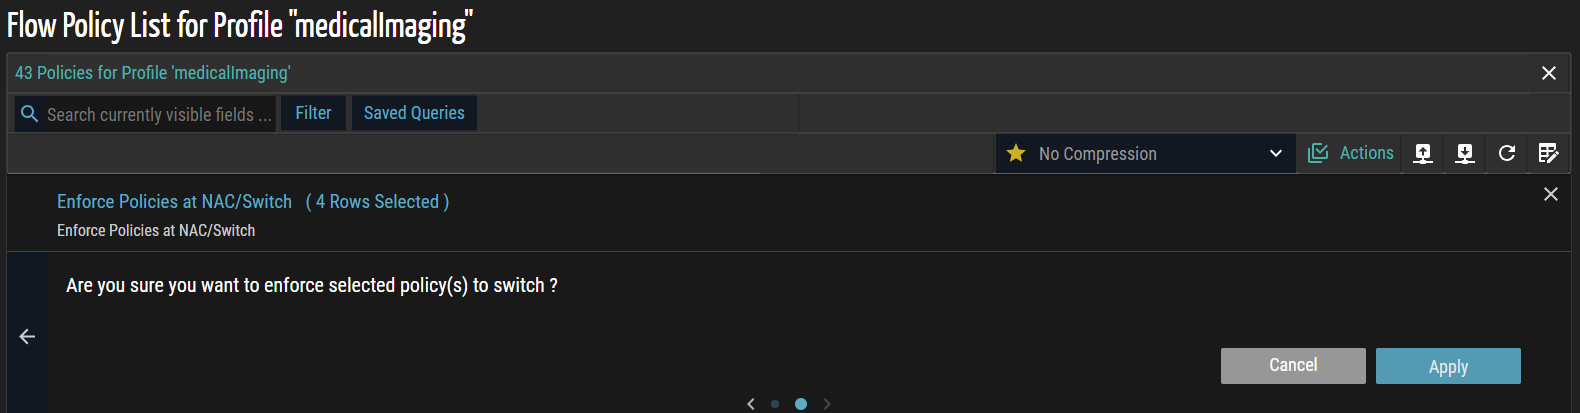
- Click the forward (>) arrow to navigate to the next page. A confirmation message appears, prompting you to review and confirm the selected policies before enforcing them on the switch.
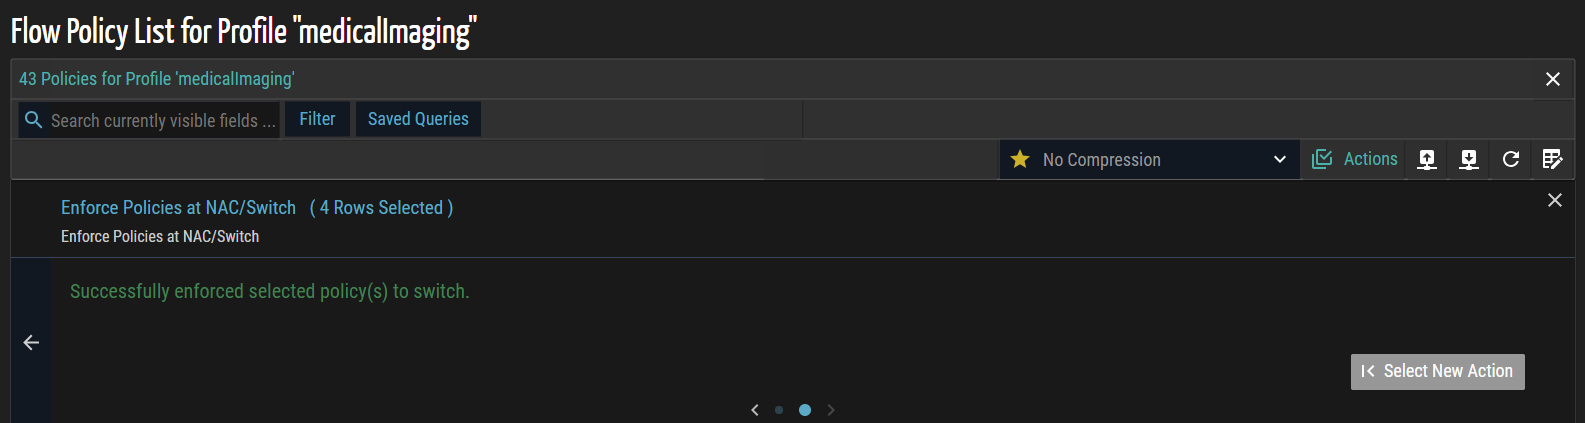
- Click Apply to enforce the selected policies on the switch. A confirmation message appears indicating that the enforcement has completed successfully.
Removing Policies from Flow Genome
In ORDR AI Protect, removing policies enables administrators to revoke previously applied security controls from NAC devices, switches, and firewalls. This process is necessary when policies are no longer required, have been updated, or must be replaced with new configurations. Administrators can identify the enforced policies associated with a profile, review their scope, and remove them from the designated devices. By removing policies, the system ensures that outdated or unnecessary rules are cleared from the enforcement infrastructure, preventing conflicts, reducing overhead, and maintaining accurate alignment with current security and access requirements. This capability provides flexibility and control, ensuring that only valid and relevant policies remain active in the network.
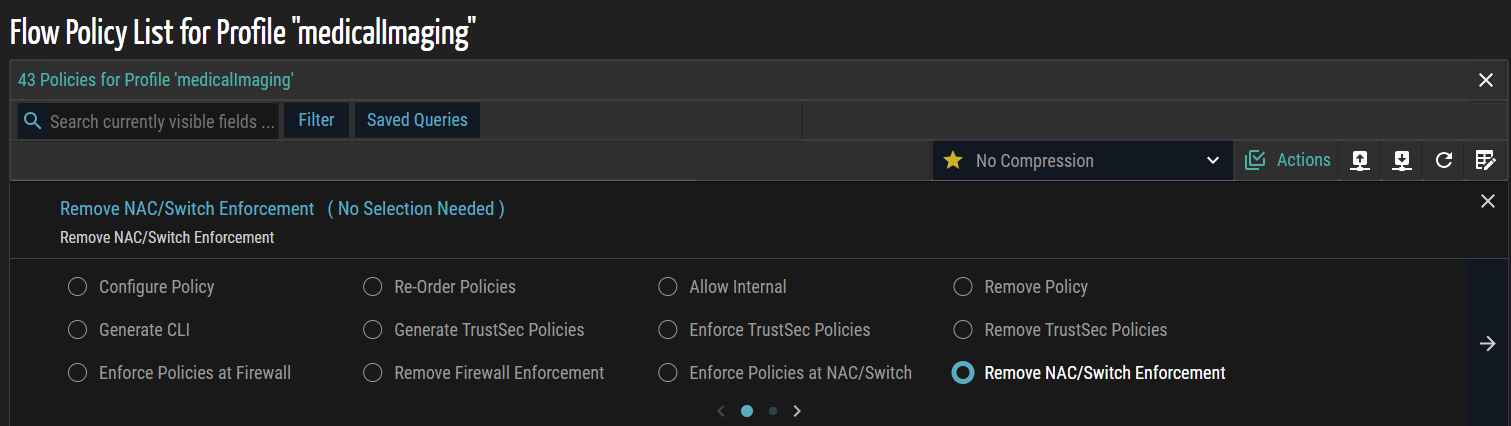
- Follow steps 1 through 6 from the Enforcing Policies from Flow Genome procedure to access the Flow Policy List panel and review the policies associated with the profile.
- From the Actions menu, select Remove NAC/Switch Enforcement to remove previously enforced policies from the designated devices.
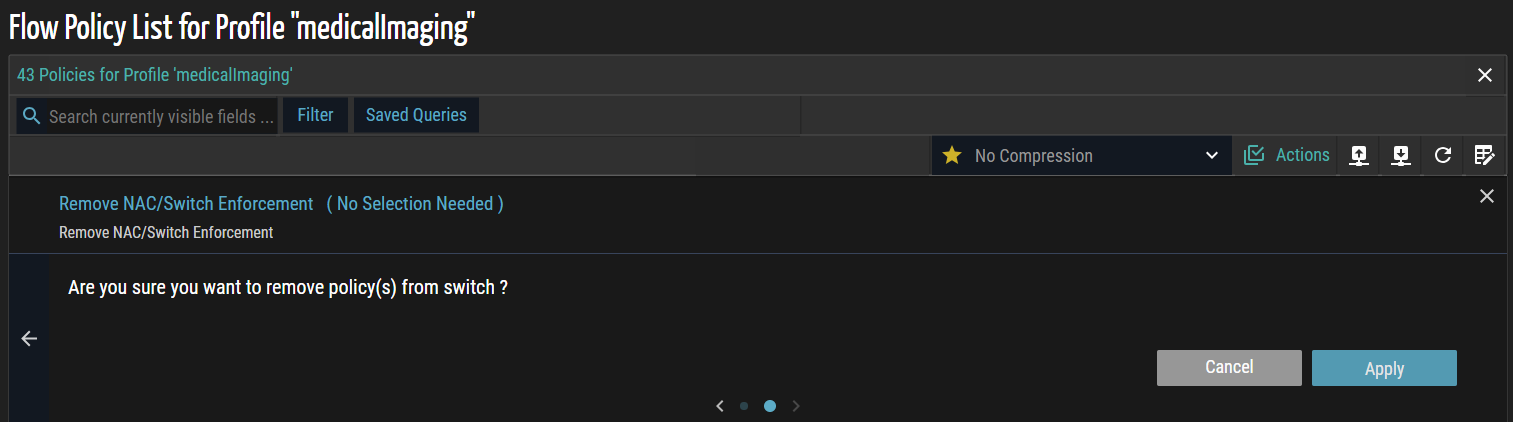
- Click the forward (>) arrow to navigate to the next page. A confirmation dialog appears, prompting review and confirmation of the selected policies to ensure only intended policies are removed.
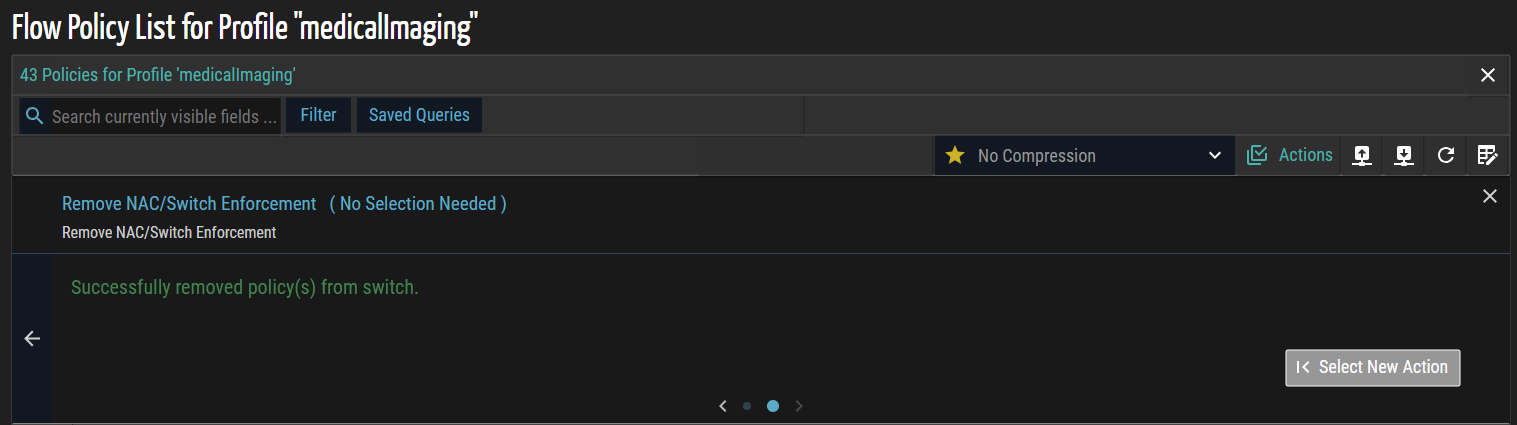
- Click Apply to remove the selected policies from the NAC or switch. A confirmation message appears, indicating that the policies have been successfully removed.
Generate CLI
The Generate CLI feature allows administrators to generate command-line interface (CLI) configurations directly from defined policies and access control requirements. This capability reduces manual configuration errors and ensures policy consistency across network devices. By using predefined templates and device-specific parameters, ORDR AI Protect automates the generation of access control lists (ACLs) and related security configurations.
- Click the (View Flow List Panel) icon in the upper right corner of the Flow Genome panel to display the Flow List associated with this profile. The list below represents all inbound and outbound communication to peers, protocols, and ports from or to this profile's selected group of devices.
- Click Actions and then select Add Flows to Policy.
- In the list that appears, review the available flows and select the required ones by checking the corresponding checkboxes to include them in the policy.
- Click Apply. A confirmation message appears, indicating that the selected flows have been successfully added for further processing.
- Click the (View Policy List Panel) icon to display all policies currently associated with the profile. This panel provides an overview of existing policy assignments and their scope, enabling verification and planning for enforcement.
- Click Actions in the Flow Policy List panel to display the available operations for the selected policies.
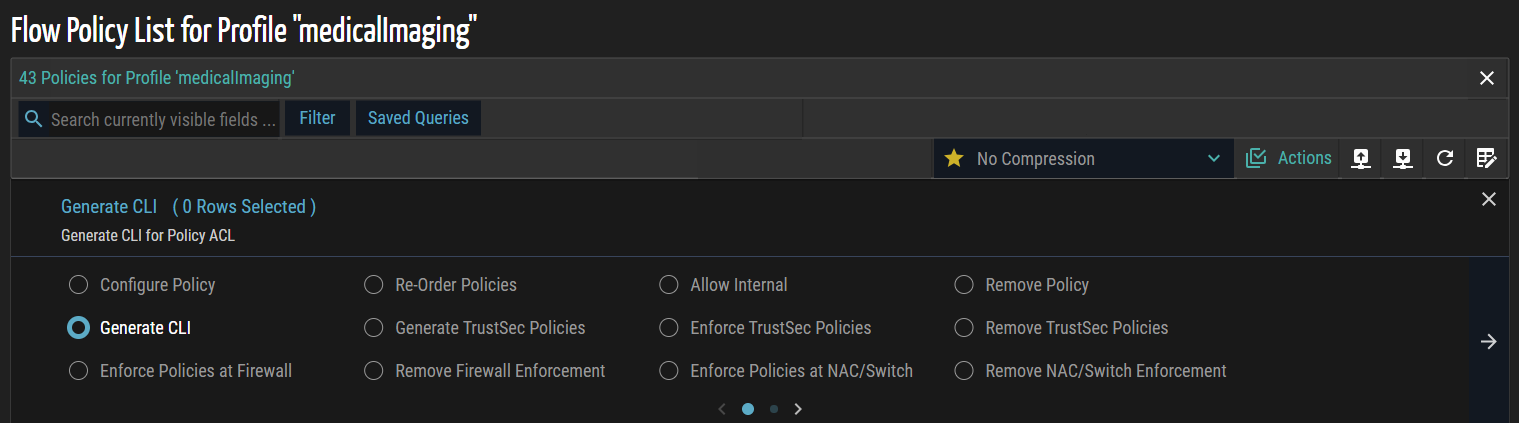
- Select Generate CLI to create the corresponding command-line configuration for the selected flows and policies.
- In the list that appears, review the available flows and select the required ones by checking the corresponding checkboxes to include them in the policy.
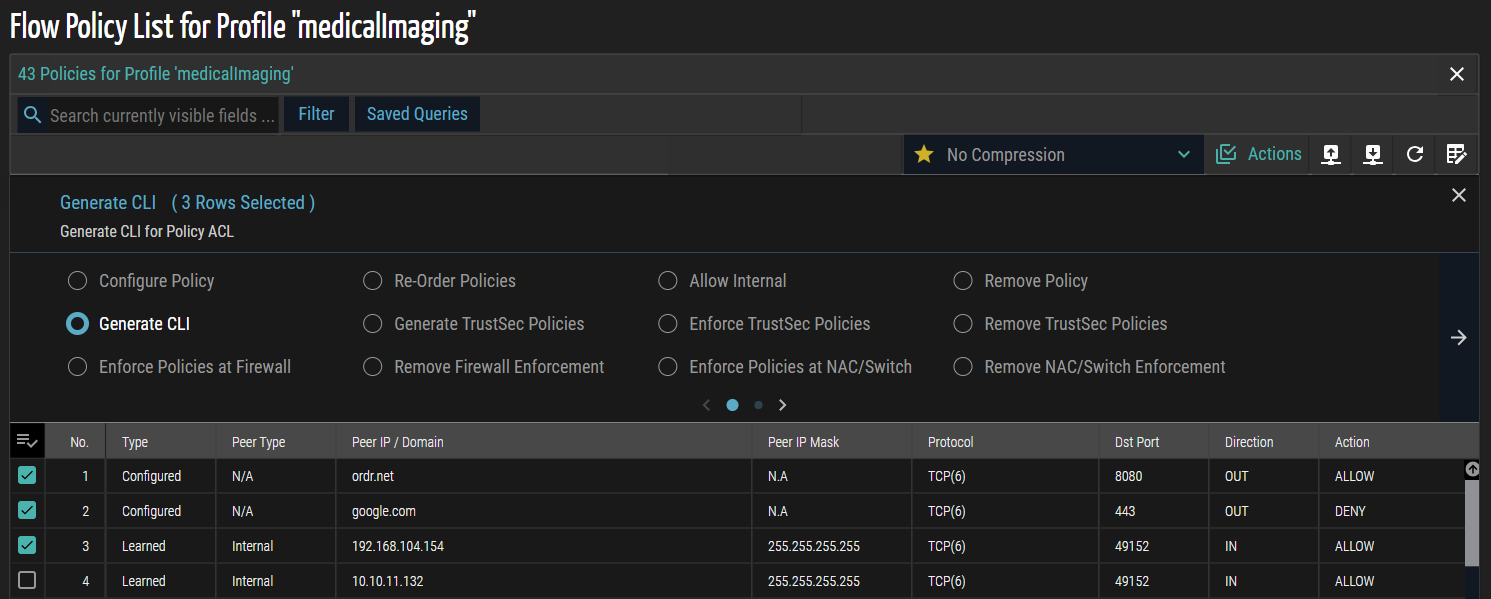
- From the Choose Compression Template drop-down list, select one of the following options to define how access control list (ACL) entries are optimized during CLI generation:
- No Compression – Each flow is represented as a separate ACL entry, providing complete visibility but resulting in larger configuration output.
- Low Compression – Similar or contiguous flows are partially aggregated, reducing repetition while preserving most individual flow details.
- Medium Compression – Flows with common attributes, such as source/destination IPs, ports, or protocols, are consolidated to reduce the number of ACL entries while maintaining logical groupings.
- High Compression – ACL entries are maximally aggregated, producing the smallest configuration script. This minimizes CLI size but reduces per-flow visibility.

- Click the forward arrow (>) to navigate to the next page. A confirmation message appears, prompting you to proceed with generating the CLI for the selected policy.
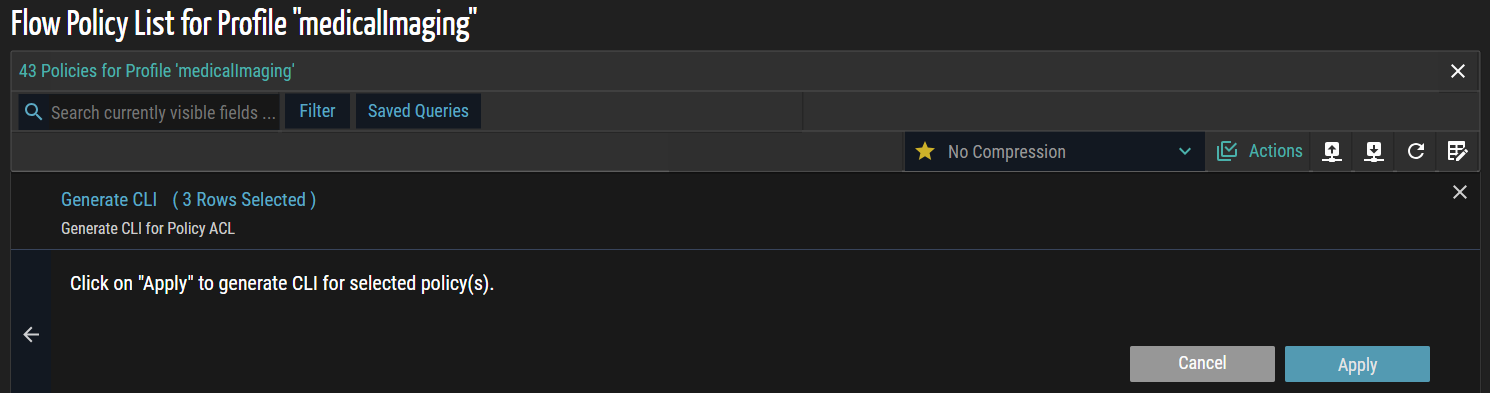
- Click Apply to generate the policy.
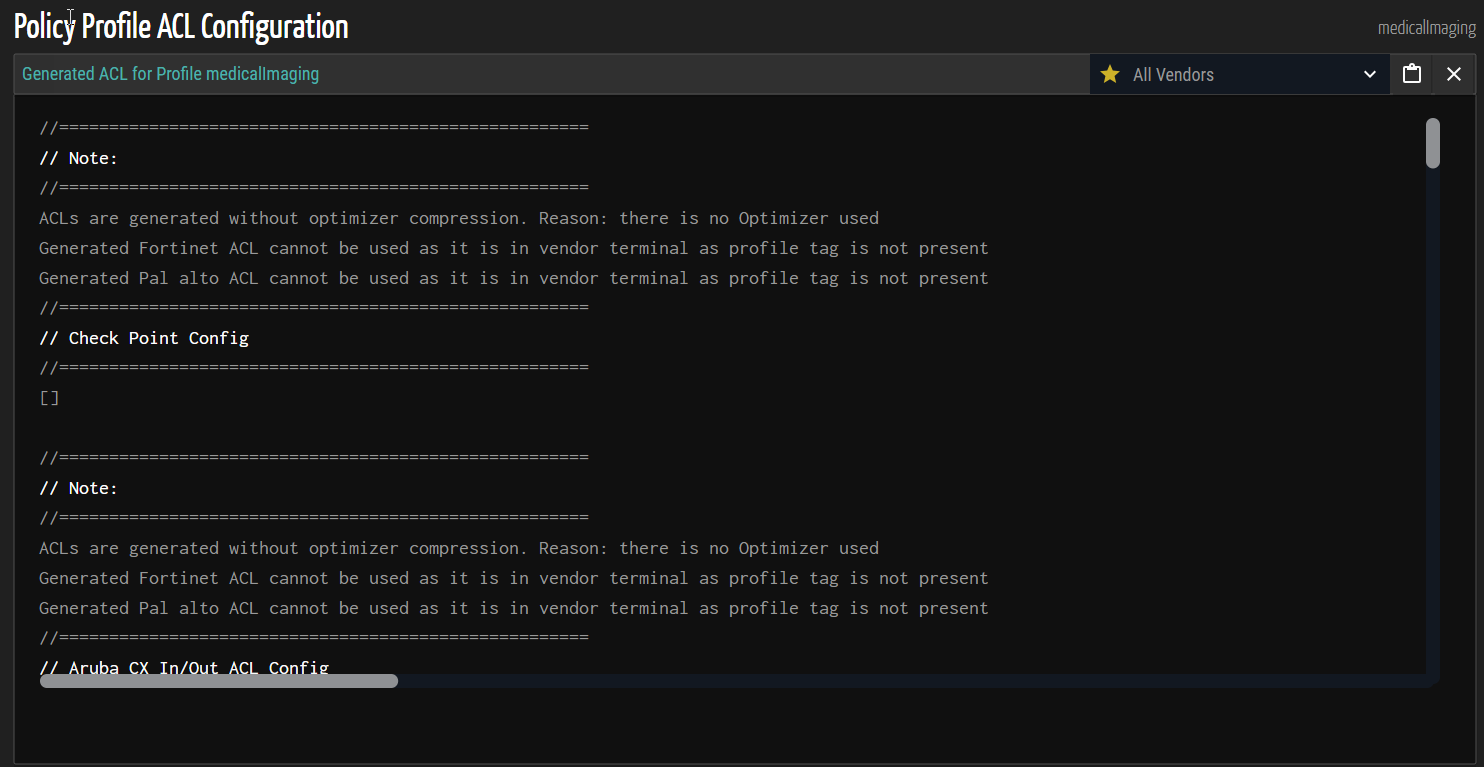
- , monitor progress in Settings > Tasks, and view results via the ACL icon
 .
.
Icons
The table below lists the icons and their functions on the Policy Profile List page.
| Icon | Description |
| Toggle between standard and expanded panels to adjust the display size on the screen. | |
| Add a new policy profile. | |
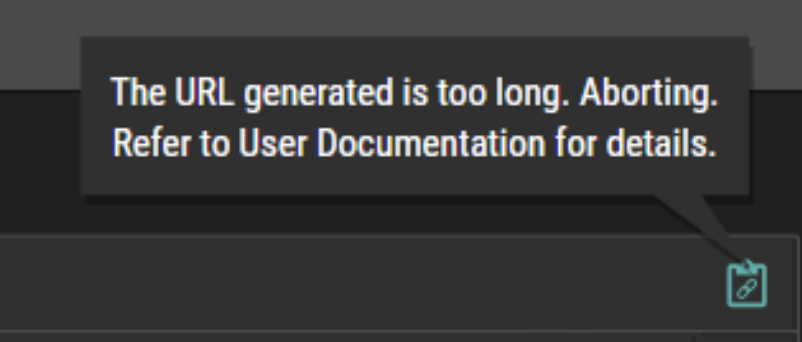
|
Generate context URL to the clipboard. The context URL can be used to share specific pages and content with others.
|
|
|
Open or close the Action panel. The following is the list of actions:
For more information, see Bulk Actions. |
|
| Download in CSV format. |
© 2026 ORDR. All Rights Reserved.